


이번에는 마우스와 관련한 이벤트에 대해서 알아보겠습니다.
우리가 웹서핑을 하면서 특정 요소에 마우스 포인터를 올리면 색이 짙어진다던가 그림자가 생긴다던가 하는것을 본적이 있을겁니다.
그럴때 이 마우스 이벤트를 사용합니다.
이것도 종류가 다양합니다. 마우스 포인터를 올렸을 때 떠났을 때 등 클릭을 하는 순간, 클릭을 후 떼는 순간 등등이 있지요.
우선 마우스 포인터를 올렸을 때에 대해서 알아봅시다.
mouseover는 요소에 마우스 포인터를 올렸을 때 입니다.
그럼 p태그를 생성하고 p태그에 마우스 포인터를 올렸을 때 텍스트의 색을 변경해봅시다.
<!DOCTYPE html>
<html>
<head>
<meta charset="utf-8" />
<title>EVERDEVEL - JavaScript - onmouseover event</title>
<script>
window.onload = function(){
var target = document.getElementsByTagName('p')[0];
target.addEventListener('mouseover', function(){
target.style.color = "red";
});
};
</script>
</head>
<body>
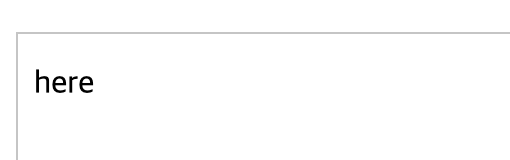
<p>here</p>
</body>
</html>
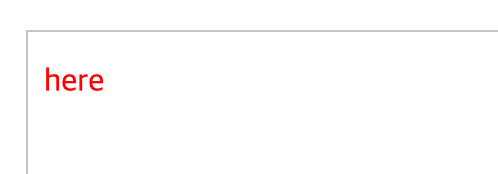
마우스 포인터를 올리면 위의 이미지와 같이 빨간색으로 변합니다.
하지만 마우스 포인터가 해당 요소를 벗어나도 빨간색이 유지됩니다.
이유는 마우스 포인터가 떠날 때의 이벤트는 생성하지 않았기 때문입니다.
그럼 이번엔 마우스 포인터가 떠날 때의 이벤트를 생성해봅시다.
마우스 포인터가 떠날 때의 이벤트는 mouseout입니다.
그럼 위의 코드에 mouseout 이벤트만 추가해 보겠습니다.
코드는 다음과 같습니다. 다시 검은색으로 변경합니다. ^^
target.addEventListener('mouseout', function(){
    target.style.color = "black";
});
<!DOCTYPE html>
<html>
<head>
<meta charset="utf-8" />
<title>EVERDEVEL - JavaScript - onmouseover event</title>
<script>
    window.onload = function(){
        var target = document.getElementsByTagName('p')[0];
        target.addEventListener('mouseover', function(){
            target.style.color = "red";
        });

        target.addEventListener('mouseout', function(){
            target.style.color = "black";
        });
    };
</script>
</head>
<body>
    <p>here</p>
</body>
</html>
이번에는 마우스의 버튼을 클릭하는 순간의 이벤트와 떼는 순간의 이벤트입니다.
누르는 순간은 mousedown 떼는 순간은 mouseup입니다.
아래의 코드를 실행하고 마우스의 버튼을 누른 상태로 유지하다가 떼면 색이 변하면서 mouseup의 효과를 확인 할 수 있습니다.
<!DOCTYPE html>
<html>
<head>
<meta charset="utf-8" />
<title>EVERDEVEL - JavaScript - onmouseover event</title>
<script>
    window.onload = function(){
        var target = document.getElementsByTagName('p')[0];
        target.addEventListener('mousedown', function(){
            target.style.color = "red";
        });

        target.addEventListener('mouseup', function(){
            target.style.color = "black";
        });
    };
</script>
</head>
<body>
    <p>here</p>
</body>
</html>
여기에서 사용한 이벤트들을 inline방식으로 사용한다고 하면 앞에 on을 붙입니다.
<!DOCTYPE html>
<html>
<head>
<meta charset="utf-8" />
<title>EVERDEVEL - JavaScript - onmouseover event</title>
</head>
<body>
    <p
    onMouseover="this.style.color='red';"
    onMouseout="this.style.color='black';"
    onMousedown="this.style.color='yellow';"
    onMouseup="this.style.color='pink';" >
        here
    </p>
</body>
</html>
위의 이벤트에 대한 행동을 해보시면 색이 어떻게 변하는지 확인 할 수 있습니다.
봐주셔서 감사합니다. 문의 또는 잘못된 설명은 아래의 댓글에 부탁드립니다.
당신의 작은 누름이 저에게는 큰 희망이 됩니다.

댓글 0개
정렬기준